Empennage- Rudder

I ordered the Empennage/Tailcone Kit to build first in the RV14A project. Van's Aircraft does not provide a "QuickBuild" option for the empennage.

RV14A Empennage Kit
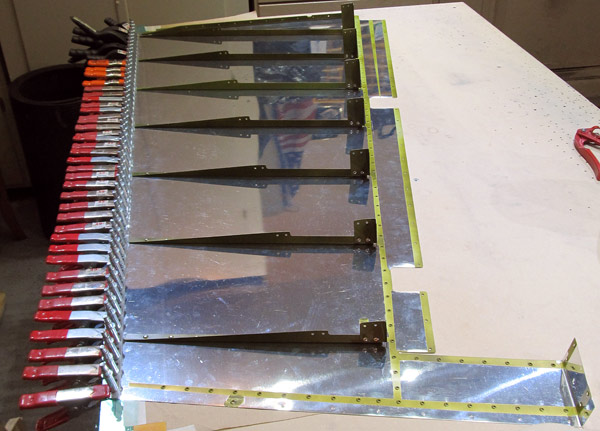
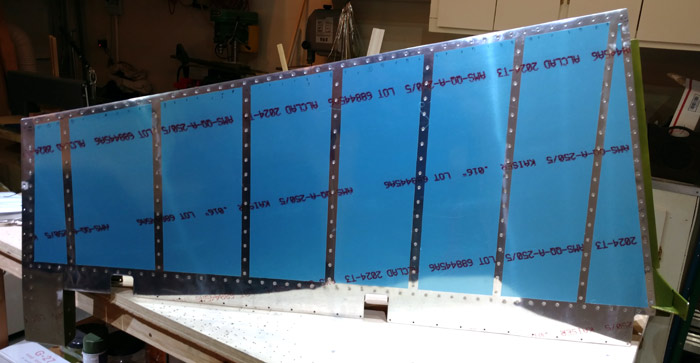
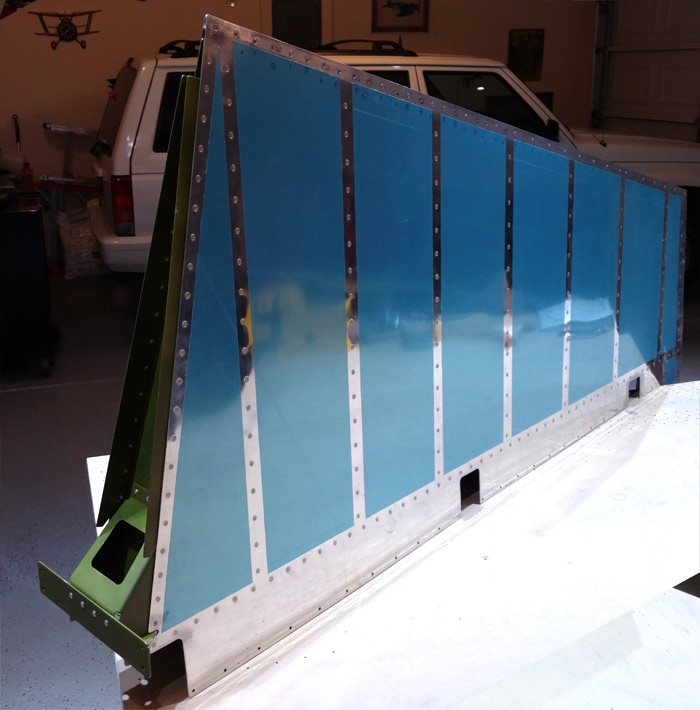
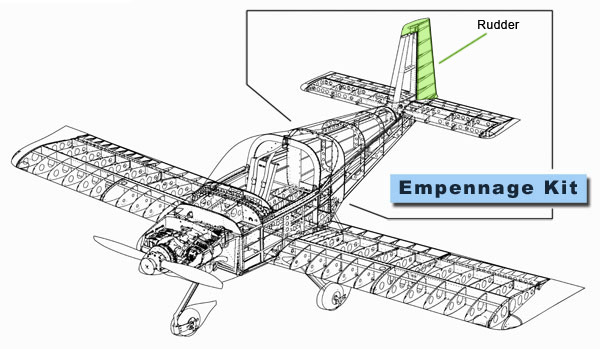
Basically, the empennage kit includes everything aft of the canopy and is about half of the total fuselage.

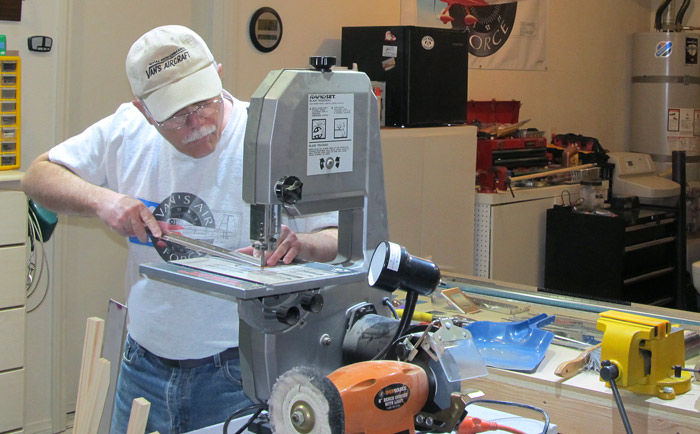
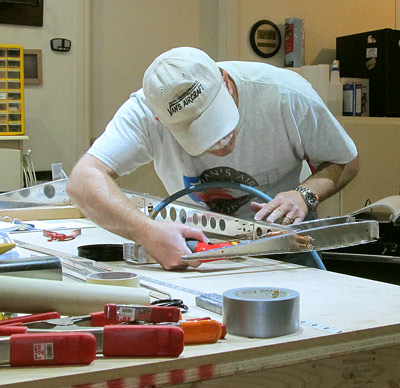
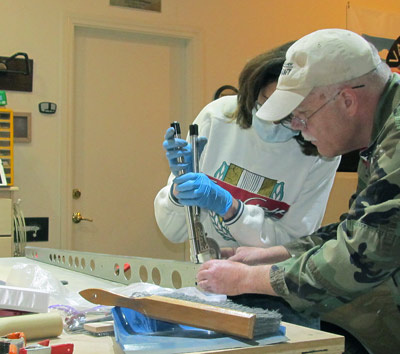
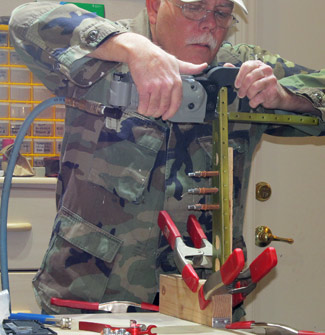
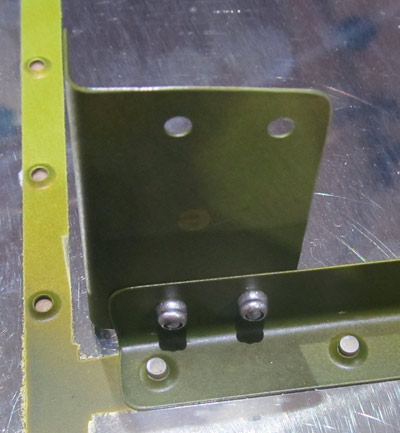
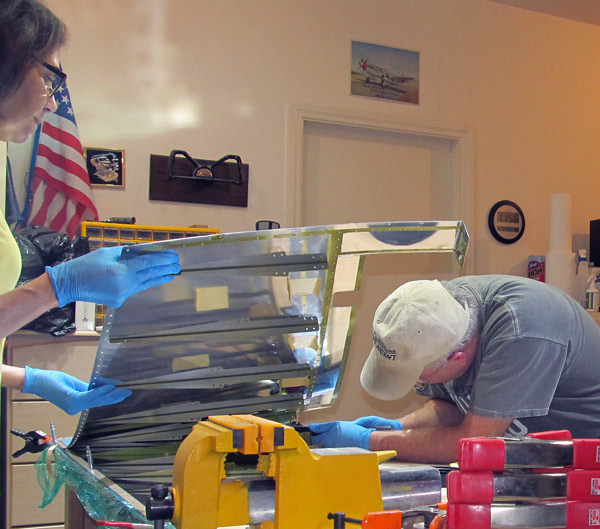
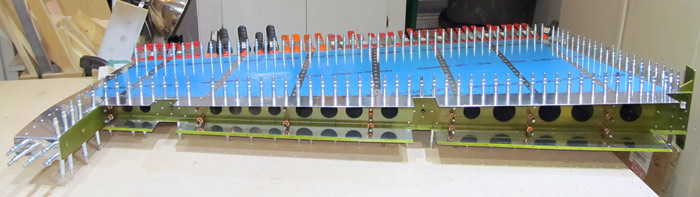
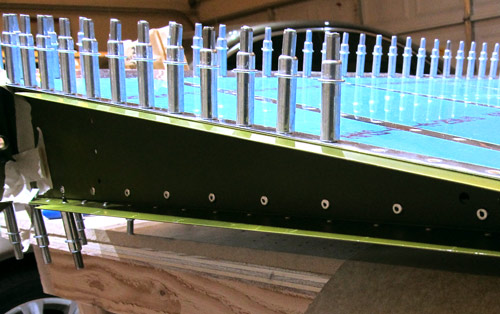
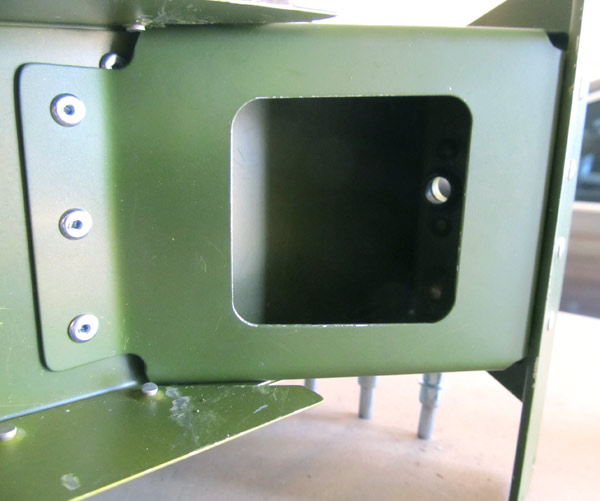
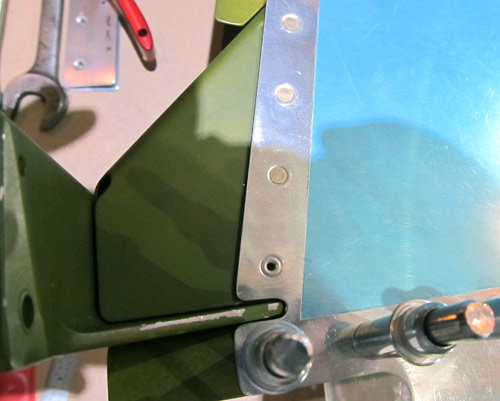
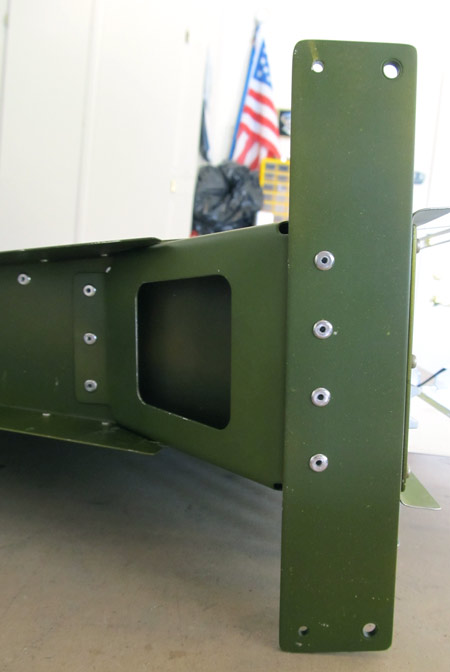
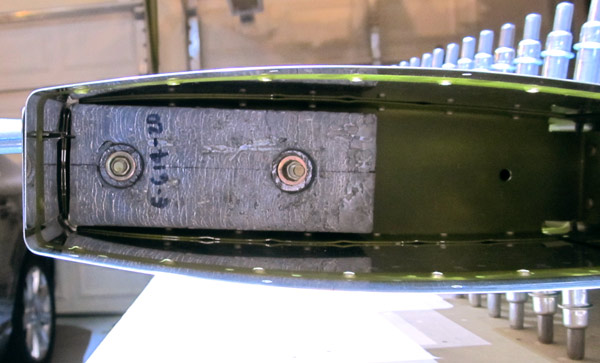
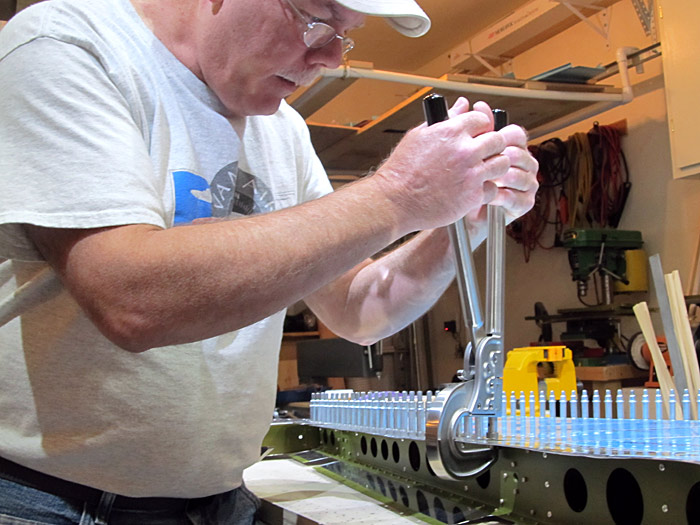
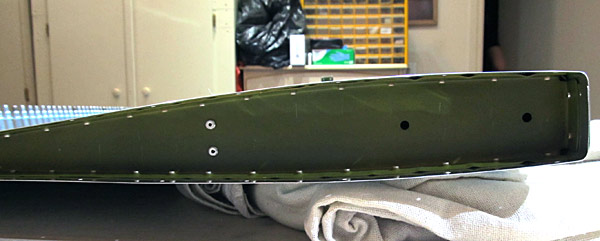
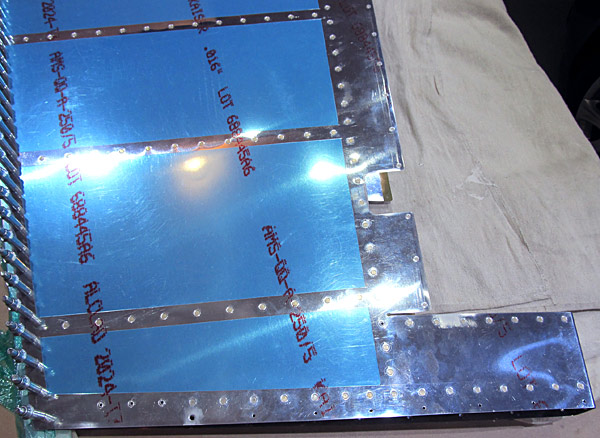
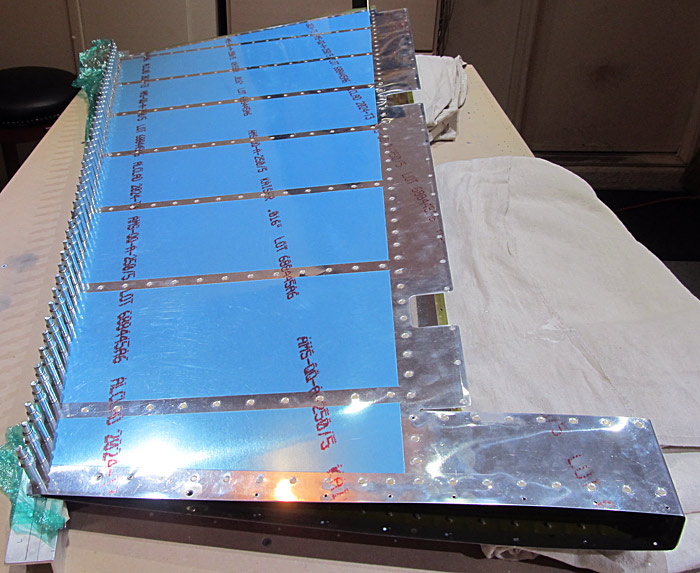
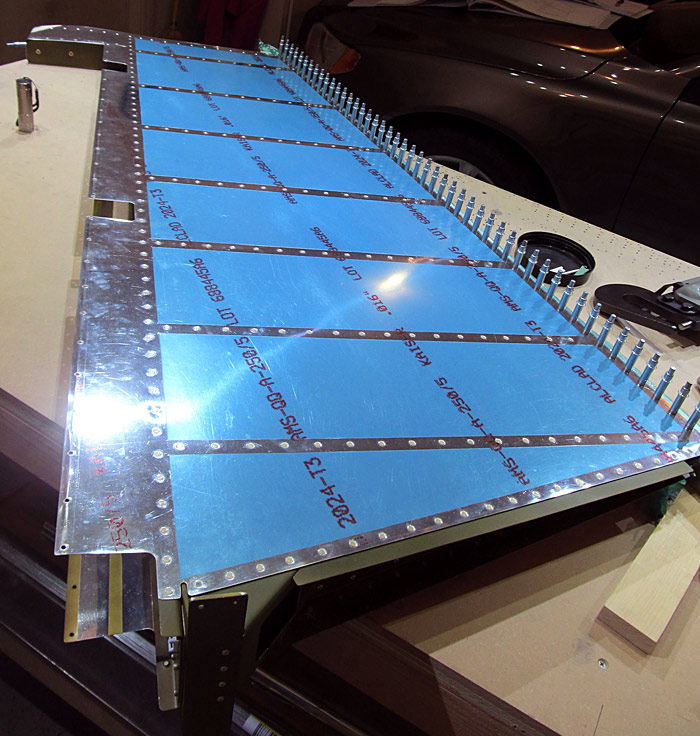
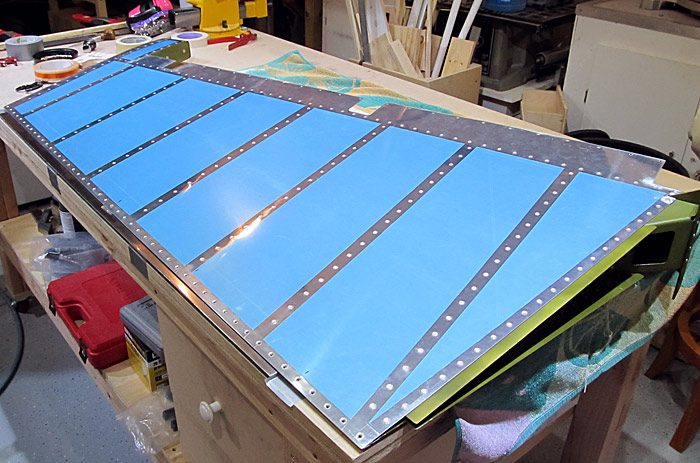
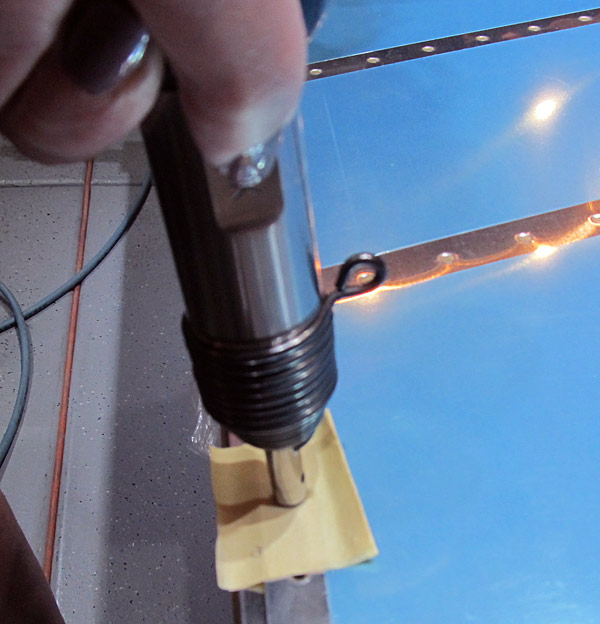
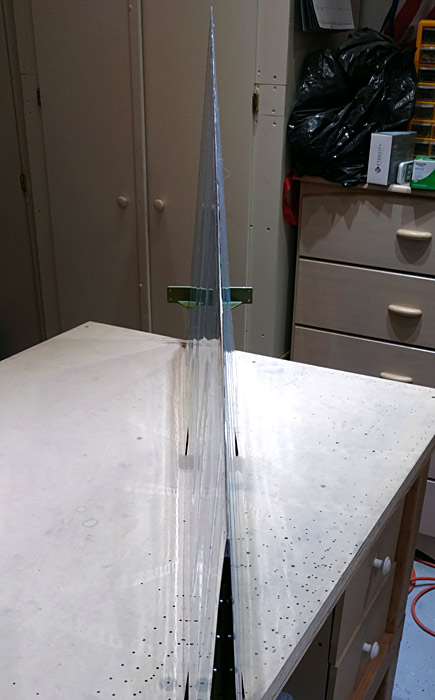
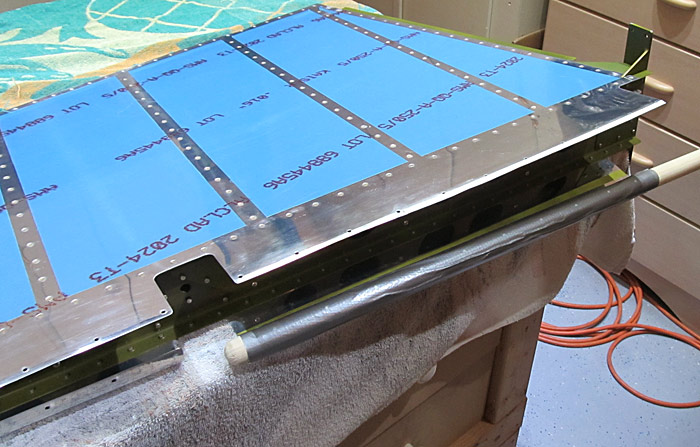
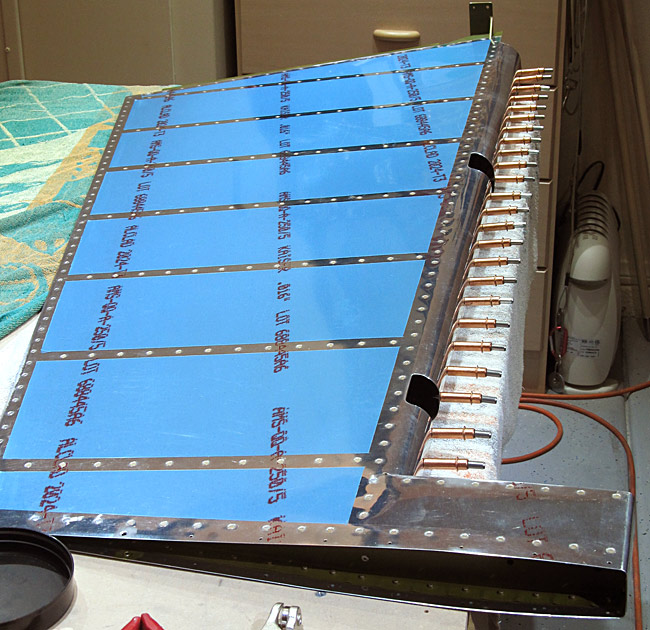
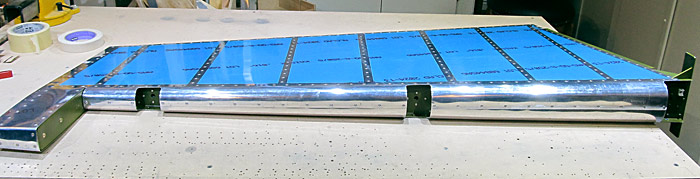
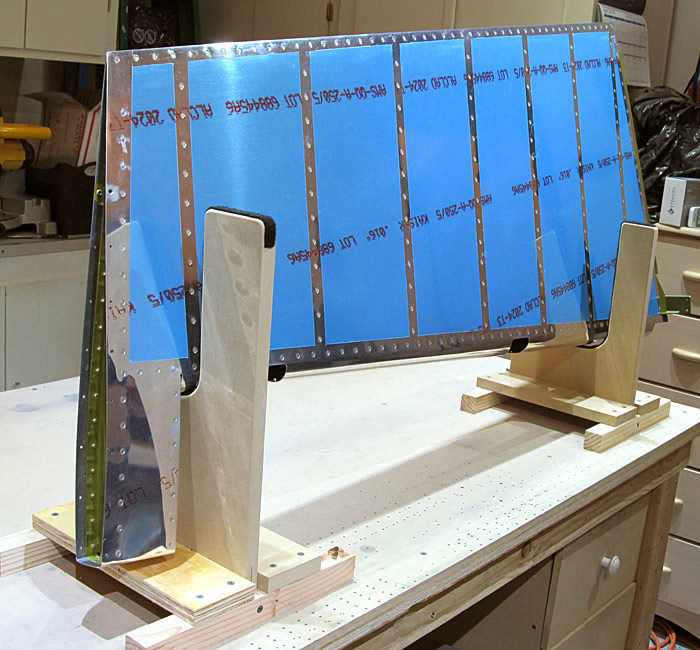
The second item to work on according to the builder's plans is the Rudder.
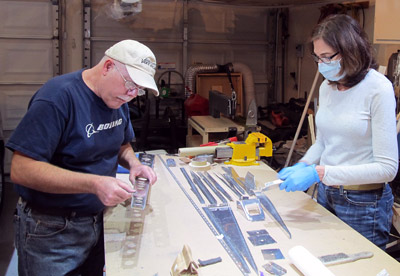
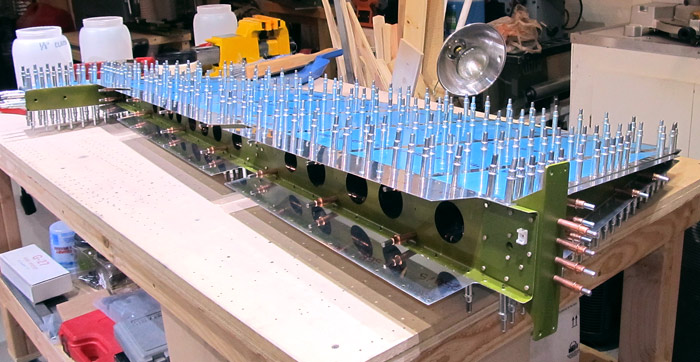
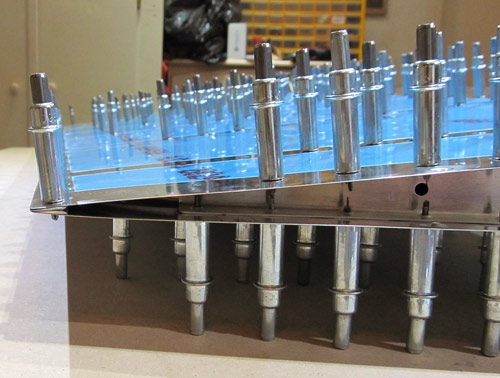
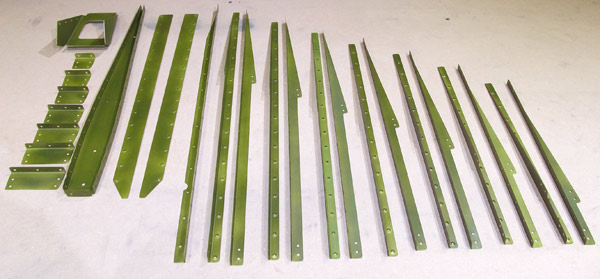
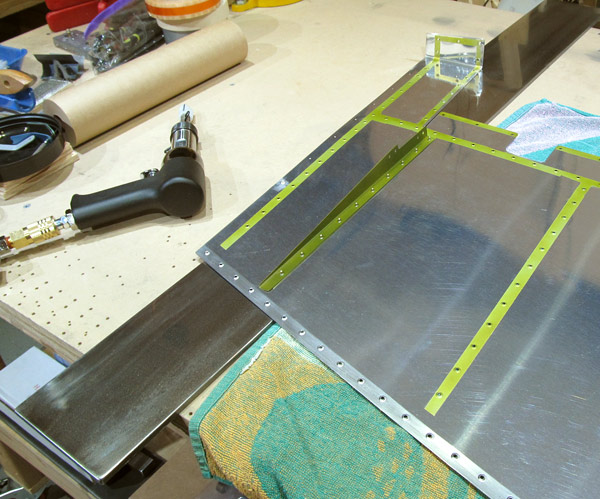
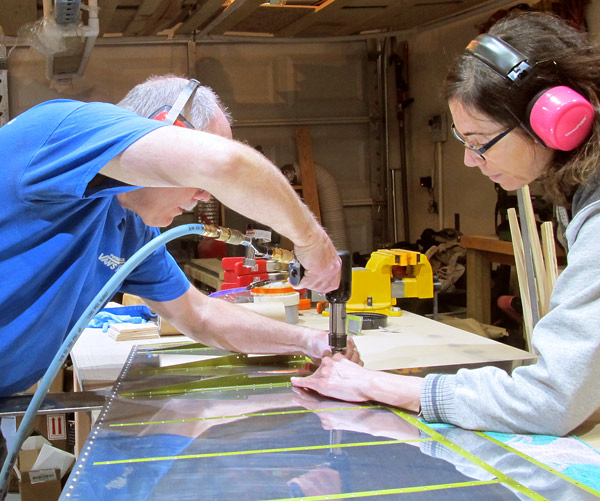
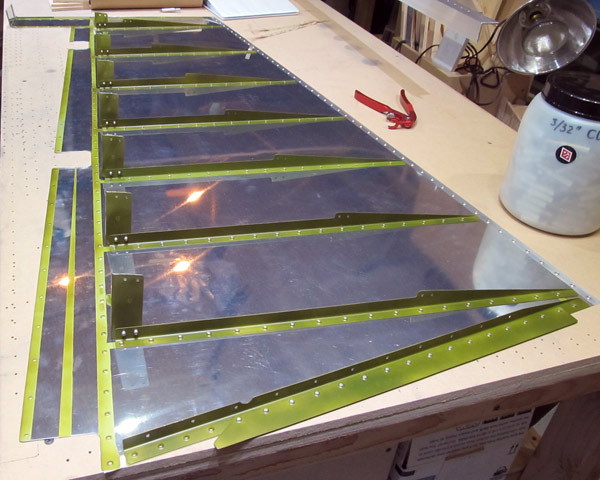
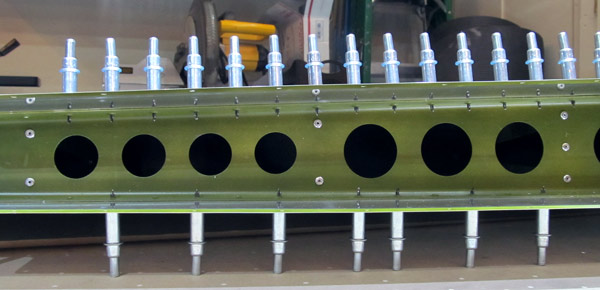
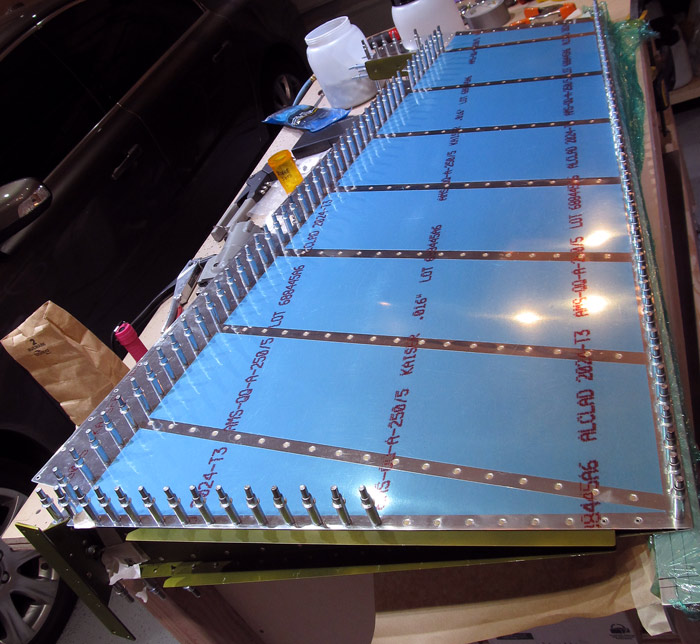
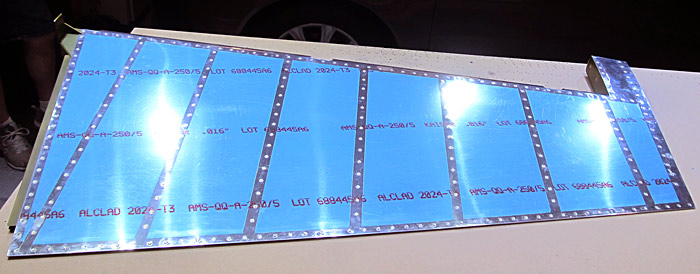
I pulled the individual parts from the inventory that are needed to assemble the rudder section.

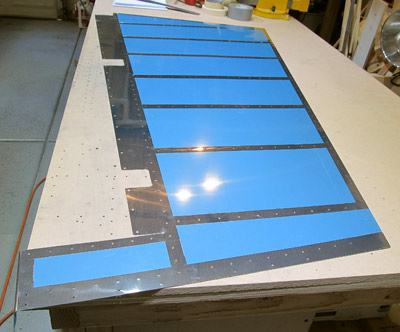
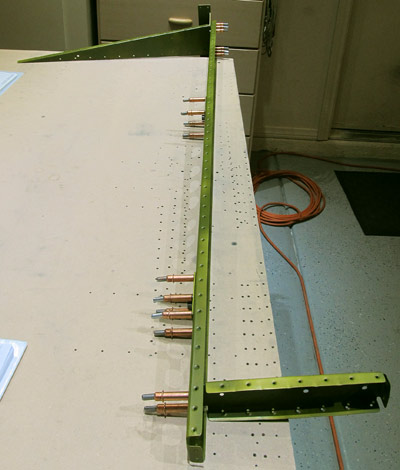
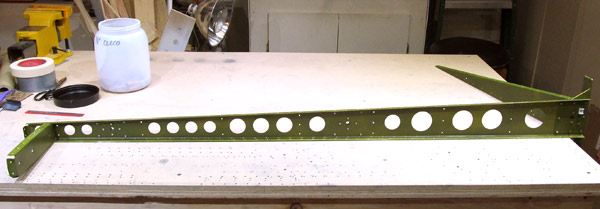
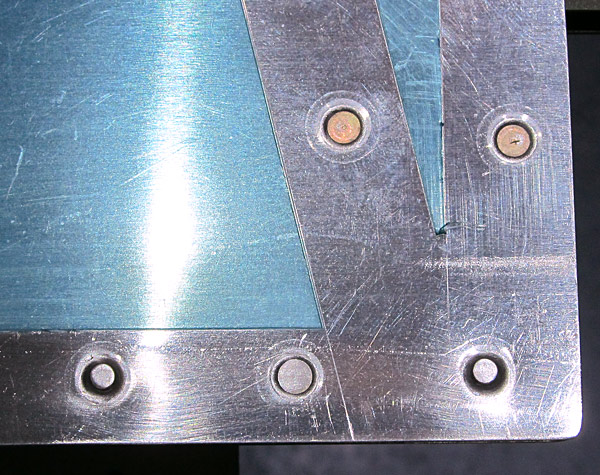
The parts included: R-00901-L-1, R-903, E-614-020, R-912, R-00914, R-00902-1, R-606PP, HW-00004, R-404PD, R-00910, R-00904-1, R-00915A-L-1, R-00918, R-00917, R-00901-R-1, R-916-1, R-00915B-L-1, R-00915B-R-1, R-00915C-L-1, R-00915C-R-1, R-607PP, R-00915D-L-1, R-00915D-R-1, R-00915E-L-1, R-00915E-R-1, R-00915F-L-1, R-00915F-R-1, R-608PP, R-00915G-L-1, and R-00915G-R-1.

Rudder parts

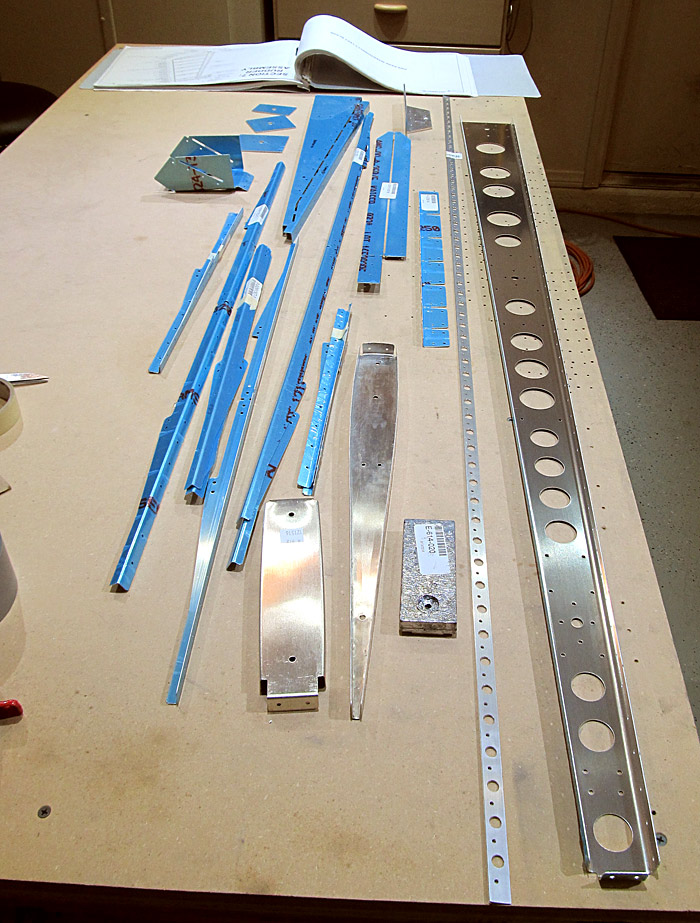
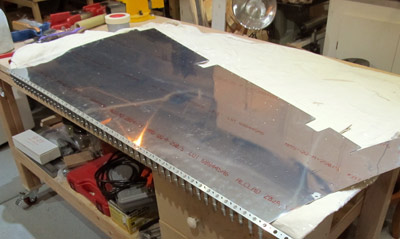
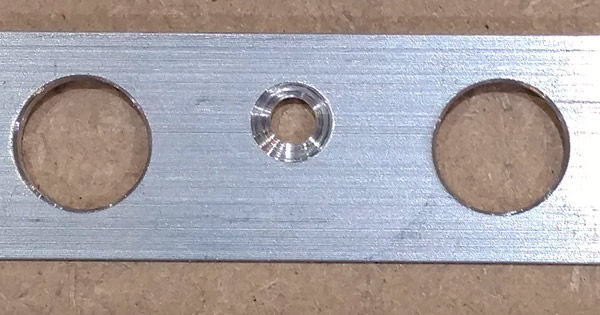
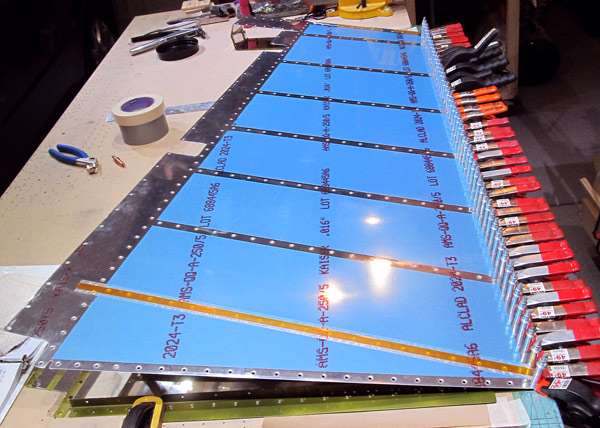
These are all of the parts except for the two skins that are needed.


Deburring Rudder parts

The basic idea is to deburr any rough or machined edges before clecoing (using small clamps to temporarily hold pieces together) and match-drilling pre-punched holes for the final riveting process.

We are using a combination of flat and round files, scotchbright (gray- "ultrafine" pads), and sandpaper to polish the edges and lightening holes before proceeding to the next step.

All of the skin stiffners (R-00915A-L-1, R-00915B-L-1, R-00915B-R-1, R-00915C-L-1, R-00915C-R-1, R-00915D-L-1, R-00915D-R-1, R-00915E-L-1, R-00915E-R-1, R-00915F-L-1, R-00915F-R-1, R-00915G-L-1, and R-00915G-R-1) for the rudder had to be trimmed to final shape and I found that (for me) using the band saw is quicker and more accurate than using aviation snips.

Trimming the stiffners

Cleco parts to sparCleco parts to spar

After all of the parts have been trimmed to final dimensions and deburred it is time to cleco the reinforcement plates (R-606PP, R-607PP, R-608PP), the bottom rib (R-00904A-1), the rudder horn (R-405PD), * which has to be nested inside of the bottom rib, and a shim (R-00917), which is "sandwiched" in between the bottom rib and rudder horn in preparation to be final drilled with a #30 drill bit.

(I used a #30 reamer because Van's has done such a super job on the hole punching that a reamer works just fine.)

Cleco parts to spar

I final drilled all of the above parts mention with the #30 reamer.


Cleco parts to spar

The counterbalance rib (R-912) was fluted and then attached to the rudder spar (R-00902-1) along with the top rib (R-903) and the attachment holes (where they attach to the spar) for both were final reamed with the #30 reamer bit.

The rest of the holes in the ribs were final reamed with a #40 reamer with the exception of the last six holes in the top rib (R-903,) which calls for a #33 drill bit because MK-319-BS rivets will be used here.

Cleco parts to spar

I then final drilled the forward hole on the counterbalance rib (R-912) with a #12 drill bit. The counterbalance weight (E-614-020) was then attached in order to locate and match drill the aft (second) hole with the #12 bit. After doing that it was easy to dimple the holes in the rib to accept a AN509-10R16 screw. The picture to the left shows the dimples made. A #10 dimple die was used to accomplish this.

CounterbalanceCounterbalance side view

Here is what the counterbalance weight (E-614-020) looks like. The #12 holes have to be countersunk to accept the dimples made in the previous step and on the side some relief holes were drilled so that when the skin is riveted to the rib the rivet tails won't interfere with the fit.


Removed excess vinyl from rudder skin

I will be working with the rudder skins shortly so I removed some of the blue protective vinyl from the right rudder skin (R-00901-R-1) and the left rudder skin (R-00901-L-1).

Of course as with everything else in the project all of the edges have to be deburred so I did that too.

The right rudder skin (R-00901-R-1) has to have a small tab plus 3/32" of additional aluminum removed from the counterbalance forward flange area so I removed that with aviator snips and filed the edge to the reference 3/32" line. (This is done so that the left rudder skin will be able to overlap the right skin later on in the final assembly process.)

The left rudder skin (R-00901-L-1) is pretty much the same as the right except there is only a small tab that needs to be trimmed.

Removed excess vinyl from rudder skin

Both rudder skins have 7 holes at the top and the aft-most hole of each has to be final drilled with a #30 bit and dimpled to receive a CS4 flush blind rivet so I did that as well.

Edge rolled left skin tab

The left rudder skin (R-00901-L-1) counterbalance flange needs to be edge rolled so that when the final riveting process occurs the skin will lay flat against the right rudder skin (R-00901-R-1).
I used a set of edge forming vise grips from Cleaveland Aircraft Tool to do that.

*If you will notice the middle hole in this counterbalance tab, it will later have to be match drilled onto the right rudder skin counterbalance tab when all of the rudder skeleton assembly and the rudder skins are clecoed together.

Edge former tool

These are the edge forming vise grips.


Spar dimpling

All of the rudder skeleton parts were dimpled at this stage since they were easily accessible. We used a hand squeezer and 3/32" sub-structure dimple dies here.

We dimpled the rudder spar (R-00902-1), the bottom rib (R-00904A-1), and the counterbalance rib (R-912).

Spar dimpling

After we cleaned and primed all of the rudder skeleton parts with a light coat of Tempo Aviation "rattle can" A-702 Zinc Phosphate primer, I clecoed everything together for final riveting.


Let the riveting begin!

Let the riveting begin!

The counterbalance rib (R-912), doubler plates (R-608PP, R-607PP, R-606PP), bottom rib (R-00904A-1), shim plate (R-00917), rudder horn (R-405PD), tie-wrap clip(HW-00004), and nutplates (K1000-6), were all riveted to the rudder spar (R-00902-1).

Most of the rivets were set using the pneumatic rivet squeezer except down by the rudder horn (R-405PD) where the bottom rib flange meets the rudder spar, I had to use my 3x rivet gun and a bucking bar because of space constraints.
The tie-wrap clip was double sided taped to the rudder spar then riveted using a LP4-5 blind rivet which was set using my G-27 CherryMax hand squeezer.

*I had to be careful at this stage because the rivets used very in length but are all AN470AD4-* types. Be sure to check the notes and rivet legend in the plans!

Let the riveting begin!

Here it is all riveted together.


Establishing Trailing Edge Wedge line

Before I clecoed all of the stiffners and rudder skeleton pieces together, I wanted to establish the length of the trailing edge wedge and mark out lines on the rudder skins where the wedge will eventually be glued (or taped) to.

I clecoed the trailing edge wedge (at this point called VA-140) to the right rudder skin (R-00901-R-1) trailing edge and drew a line on the wedge where the top of the skin intersected it.

*Before the wedge was removed for trimming a reference line was drawn along the forward edge of the wedge, onto the rudder skin, which will be used later when adhereing the wedge to the trailing edge of the skin. This is done on the left rudder skin (R-00901-L-1) as well.


Once the trailing edge wedge is trimmed it is called (R-916-1). It ends up being about 49" long.


rudder skeleton rigged

The top rib (R-903), bottom rib (R-00904B-1), rudder shear clips (R-00914A through G), and rudder stiffners (R-00915A-L-1 and R-00915A-R-1) through (R-00915G-L-1 and R-00915G-R-1) were clecoed together to the rudder skeleton assembly.

The right rudder skin (R-00901-R-1), rudder horn brace (R-00910), and right attach strip (R-00918) was then clecoed to all of this.

rudder and skins clecoed together

Everything was then "flipped" over and the left rudder skin (R-00901-L-1), left attach strip (R-00918), and trailing edge (R-916-1) was attached by clecoes to all of the rest......looks like a porcupine!

All of the holes in the skins and parts were final drilled (actually reamed with a #40 reamer) and the middle hole in the counterbalance flange was also matched drilled using a #40 drill.

*There is a note in the plans about the top seven holes in each of the rudder skins; they should not be drilled at this time (they will be drilled later when fitting the top fairing).


Drill trailing edgeDrill guide

The plans call for the trailing edge holes of the left rudder skin (R-00901-L-1), right rudder skin (R-00901-R-1), and trailing edge wedge (R-916-1) to be drilled at a 90° angle relative to the rudder cord with a #40 drill so I made a guide out of 1/8" aluminum angle to help guide my drill to do that. I measured the angle to be about 87°.


All sub parts primed

Everything was then taken apart, deburred, dimpled, cleaned, and primed using a light coat of Tempo Aviation "rattle can" A-702 Zinc Phosphate primer.

All sub parts primed

I used a set of edge forming vise grips from Cleaveland Aircraft Tool to edge roll the trailing edge of both rudder skins and then we dimpled the skins with the DRDT2.

The attach points were primed with a light coat of Tempo Aviation "rattle can" A-702 Zinc Phosphate primer.


Back rivet plate

While the paint was drying on all of the parts that we primed (I like to let it dry for several days before handling it) I made a four foot back rivet plate out of cold rolled steel and polished it so we wouldn't get any marks in the rudder skins when we rivet the stiffners to them.

*I have heard of some bad accidents made because of folks not always being aware of where the shorter back rivet plates were and hopefully this four foot one will prevent me from doing the same!

outflow jig

I also made an outflow jig so that when I countersunk the trailing edge wedge (R-916-1) it would not droop and get twisted or bent. It gets pretty flimsy when hanging beyond the countersink jig and drill press.

*The aluminum angle behind the drill press has holes that I drilled in it so that when the trailing edge is adhered to the skins everything will be held in place and be nice a straight.

Below is what the machine countersunk trailing edge hole looks like. It is the same on both sides and is done 90° from the surface of the rudder skin. I used a jig from Cleaveland Aircraft Tool made specifically for the RV14.

Countersink trailing edge

Back rivet stiffners

Here is the four foot back rivet plate setup as we begin to rivet the stiffners to the rudder skins.

Teamwork riveting the stiffners

We back riveted all of the stiffners (R-00915A through G-1-L) to the left rudder skin (R-00901-L-1) and all stiffners (R-00915A through G-R-1) plus the bottom rib (R-00904B-1) and attach strip (R-00918) to the right rudder skin (R-00901-R-1) being careful not to rivet any of the four holes where the rudder horn brace (R-00910) will be attached.

Done with stiffners

Here it is, stiffners all riveted on! I attached all of the rudder shear clips as well using the G-27 CherryMax rivet gun and LP4-3 rivets.

Rudder shear clip

Edge rolled left skin tab

The trailing edge of the right rudder skin (R-00901-R-1) and the trailing edge wedge (R-916-1) were then cleaned and the wedge was double sided taped to the rudder skin using 3M™ F9460PC VHB structure tape that I bought from Van's Aircraft.

I then clamped and clecoed everything down to a 1/8" thick aluminum angle to keep everything straight and secure while the tape fully cures.

*According to 3M™, after application, the bond strength increases as the adhesive flows onto the surface.
At room temperature, the adhesion becomes stronger - 50% (approx.) after 20 minutes, 90% after 24 hours, and 100% after 72 hours.

Edge rolled left skin tab

Van's sells the tape in 1/2" x 60 yard rolls. The 3M™ F9460PC VHB double sided tape is thin, UV, and solvent resistant. It is a High performance acrylic adhesive with exceptional holding power and long-lasting adhesion.
Van's recommends it now over Proseal adhesive because in the past the Proseal was being applied too thickly but they say either method is acceptable. You need to apply this tape with firm pressure for best bond strength.

*(It has a 18 month shelf life from date of manufacture.)

Here is a link if you want to learn more about the application technique for the double sided tape...

Practice trailing edge piece

I made a sample trailing edge piece so when I get to double flush riveting later I'll have something to practice on.


Joining Rudder Skins Together

Here is where it is really handy to have an extra set of helping hands. Joining the two skin assemblies together is a lot easier with two then it would be trying to do it solo!

It is important that when riveting the stiffners together that you orient everything the right way. Only the forward hole in the aft end of each stiffner receives a rivet and the left rudder skin stiffners are supposed to be on top of the right rudder stiffners however, the front or leading edge of the left rudder skin stiffners are supposed to be below the shear clips on the right rudder skin assembly.

All the rivets used here are LP4-3 blind rivets and set with a CherryMax G-27 hand rivet gun.

Looking at Rudder Stiffners

Rudder Skins Together

As we were putting the two rudder skin assemblies together the trailing edge wedge (R-916-1) was cleaned with isopropyl alcohol and a layer of 3M™ F9460PC VHB double sided tape was applied so that as we riveted the stiffners and worked our way towards the top of the rudder the trailing edge could be clecoed and clamped to the 1/8" aluminum angle to keep everything straight.

Here is what that looks like...can't have enough clamps!

Rudder Spar Placed In Between Rudder Skins

After sufficient time had elapsed for the trailing edge- double sided tape to partially cure, the rudder spar assembly is inserted in between the rudder skins and clecoed together.

Rudder Spar Placed In Between Rudder Skins

You have to pay attention to how everything is positioned at the bottom of the rudder.

Make sure that the bottom rib (R-00904B-1), on the right rudder skin, is positioned above the bottom rib (R-00904A-1) located on the left rudder skin. These will later be riveted together as shown here.


Rudder Skin Assemblies Blind Riveted to Shear Clips

The rudder skin assemblies were blind riveted to the rudder shear clips (R-00914A through G), using LP4-3 rivets and set with a CherryMax G-27 hand rivet gun.

*There are 18 rivets to set and this is what it looks like.


Rudder Skin Attach Strips and Riveting

After 72 hours had passed, so that the 3M™ F9460PC VHB double sided tape would be fully cured, the remaining attach strip (R-00918) was clecoed to the inside of the bottom rib (R-00904A-1) flange and left rudder skin assembly.

The aft 8 holes are to be riveted together at this time and was done using our pneumatic squeezer with a 4 inch "no hole" yoke. AN426AD3-3.5 rivets are supposed to be used but we found that AN426AD3-4 rivets worked better. The last two rivets at the trailing edge were substitued with MK-319-BS rivets because the space constraints in this area are very tight. We used the CherryMax G-27 rivet gun to set those.

*The remaining 13 holes are not riveted at this time because you need to be able to spread the skin enough to get the rudder horn brace installed later on.

Trailing Edge Rivet Substitution

This is what the MK-319-BS rivets look like.
They are flush countersunk blind rivets.

*They are called for in the plans to attach the top rib at the trailing edge of the rudder because of tight space constraints in that region too.

Rudder Spar Placed In Between Rudder Skins

The bottom rib (R-00904B-1), on the right rudder skin, which is positioned above the bottom rib (R-00904A-1) located on the left rudder skin, is riveted together using LP4-3 blind rivets and set with a CherryMax G-27 hand rivet gun.

Rivet Gun Wedge Tool

The forward most LP4-3 blind rivet is tough to get at with the hand rivet gun, because it is so close to the rudder spar, but if you make the Wedge Tool mentioned in the manual section 5.4 titled "Riveting," page 05-06, it allows the rivet gun to clear the spar and still squarely sit on the rivet head....it really works!


Rudder Horn Brace Was A Tight Fit

The rudder horn brace (R-00910) was clecoed into position in preparation for final riveting.
This is a tight fit in this area and I had to do some minor file work on the brace so that it would clear some of the rivets already set in previous operations but it was only minor work and it finally "snapped" into place!

The three rivets seen on the tab here are LP4-3 blind rivets which are set using the CherryMax G-27 rivet gun.

Rudder Horn Brace Rivet Substitution

The remaining holes in the right and left rudder skin assemblies, the attach strip (R-918), and rudder horn brace (R-00910) were set with the pneumatic squeezer and AN426AD3-4 rivets.

I had to substitute one rivet as you can see in the photograph to the left.
The first rivet just behind the rudder horn (R-405PD) had to be set using the CherryMax G-27 rivet gun and a substitute MK-319-BS rivet. The space was too tight to get any of my riveting tools in there.

*I did this after consulting with Van's Aircraft Technical support....nice folks!

Rudder Horn Brace Rivet Substitution

There are four holes remaining in order to finish riveting the rudder horn brace (R-00910) to the rudder horn (R-405PD) and again, I couldn't get any of my riveting tools into the tight spot so I substituted the AN470AD4-6 rivets with LP4-3 blind rivets, which was set using the CherryMax rivet gun.

*I did this after consulting with Van's Aircraft Technical support.


Rudder Counterweight

The rudder skin assemblies were riveted to the counterweight rib (R-912) using our pneumatic squeezer with a 4 inch "no hole" yoke and AN426AD3-3 rivets. We found that a AN426AD3-4 rivet worked better where the rib and two rudder skins overlapped so we substituted those for the AN426AD3-3.5 rivets called for in the plans.

The counterweight (E-614-020) was installed onto the counterweight rib (R912) using the hardware MS21042-3, NAS1149F0363P, and AN509-10R16 called for in the plans.

*I made sure to trim material from the counterweight so that the rivet tails would have clearance between the skin and the counterweight.


Rudder Skins Riveted to Spar

The rudder skins were then attached to the rudder spar (R-00902-1) using AN426AD3-3.5 rivets and were set mostly with the pneumatic rivet squeezer equipped with a 4" no-hole yoke.

We used the hand squeezer where the rivets that attach the nutplates (K1000-6) interfered with the pneumatic 4" no-hole yoke.

*We started the riveting process in the middle and worked our way towards each end of the rudder.

Rudder Top Rib Riveted to Spar

The rudder top rib (R-903) was clecoed to the rudder skin assembly and the rudder spar (R-00902-1).

We attached the top rib (R-903) to the rudder spar, (R-00902-1) using LP4-3 rivets set with the CherryMax G-27 rivet gun.

The rivets that attach the rib to the skins were set with the pneumatic squeezer equipped with a 4" no-hole yoke.

We used AN426AD3-3.5 rivets around the edge of the top rib (R-903). The two rivets just forward of the last three holes that will be blind riveted had very tight space restrictions so we set them with our 3x rivet gun and a thin tungsten bucking bar.

Rudder Tip Rivets

The last three holes on each side of the top rib are set using using the CherryMax G-27 rivet gun and MK-319 BS rivets.

*That is why Van's has a note to final drill these holes with a #33 drill bit.


Rudder Spar Rivets Set

The Rudder Spar is final riveted to the rudder skins.


Rudder Trailing Edge Ready For Riveting

The clecoes have been removed from the trailing edge of the rudder and is placed onto the 4 foot back riveting plate that I made in preparation for final riveting.

The rivets to be used here are AN426AD3-3.5 rivets but they are to be "double flush" set.

3x Backrivet Setup

The rivet will be initially set using a back rivet head in our 3x rivet gun against the back rivet plate.

3x Mushroom Setup

The rivet will be final set using a mushroom set in the rivet gun to make the shop end flush with the rudder skin.

Setting The Rivets

We like to place a piece of double layered masking tape, with a hole cut in it from a paper punch, over the rivet so that we don't get any "dings" on the initial set of the rivet.

Van's recommends starting in the center of the rudder and then partially setting every tenth rivet while working out towards the top and bottom of the rudder. Do this until all of the "tenth rivets" are all partially set.
We then changed the back rivet set in the rivet gun to the mushroom set and then flush set the rivets.

Next, we "flipped" the rudder over, changed back to the back rivet set in our rivet gun, and starting at the center of the rudder, we partially set every fifth rivet (between the first ten we had already set.
Setting the rivets from the opposite side is supposed to keep the trailing edge straight.)

After partially setting each fifth rivet, we again changed out the back rivet set in the rivet gun for the mushroom set and then flush set all of the "fifth" rivets.

Okay, I know this is getting crazy, we then switched back to the back rivet set in the rivet gun, "flipped" the rudder over and then partially set every second rivet (between each of the five already set). Time to switch the back rivet set for the mushroom set and flush set all of the "second" rivets.

If you didn't think we were "nuts" before, you are probably thinking it now, because we switched the rivet gun back to the back rivet set, "flipped" the rudder over, and then partially set all of the remaining rivets (between the seconds). After the partial set was done, we changed the back rivet set in the rivet gun to the mushroom set and flush set all of the remaining rivets....there are 49 rivets total.

Rudder Trailing Edge

All of the flipping and switching rivet gun sets worked! Our Rudder trailing edge came out nice and straight.


Left Rudder Trailing Edge
Right Rudder Trailing Edge
Closeup of Trailing Edge

Bending Rudder Leading Edge

The last step in building the rudder is to form the leading edge. We are using a 1 inch wooden mop handle with a pair of vice grips at the end of the handle for extra gripping power.

With the right side of the rudder laying down on the table, we started at the top, just under the counterbalance rib, placed duct tape onto the handle and the skin, and then made the first curve. We did the same thing for the next tabs and worked our way down towards the bottom of the rudder.
* The first tab is the easiest because it is short, but on the longer tabs the vice grips really helped out to form the bends because we needed a little more "muscle"!

After all of the bends on the right rudder skin were made, we flipped the rudder over and repeated the process on the left side.

Rudder Profile Templates

The plans have three templates that you can make in order to check the profile of the bends being formed.

I made mine out of plywood.

Rudder Leading Edge Clecoed

Once all of the bends were done, we clecoed the leading edge together so that we could rivet everything together.

There are 25 rivets to set and the plans call for AD-41-ABS blind rivets here, which were set using our CherryMax G-27 rivet gun.


Finished Rudder

The leading edge rivets are set....yeah!

Finished Rudder
Finished Rudder In Cradles

Off to storage for a while!


So on to the horizontal stabilizer.......▶
◀.......Click here to go back to vertical stabilizer.

Amazon Affiliates Disclosure

Aerotoons®, is a participant in the Amazon Affiliates Program. For more information please visit our terms of use and policies page.