Empennage- Vertical Stabilizer
I ordered the Empennage/Tailcone Kit to build first in the RV14A project. Van's Aircraft does not provide a "QuickBuild" option for the empennage.
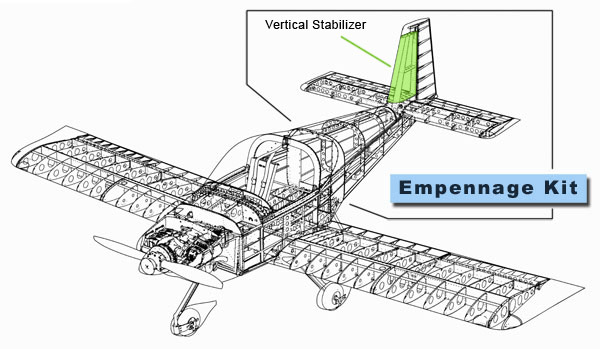 Basically, the empennage kit includes everything aft of the canopy and is about half of the total fuselage.
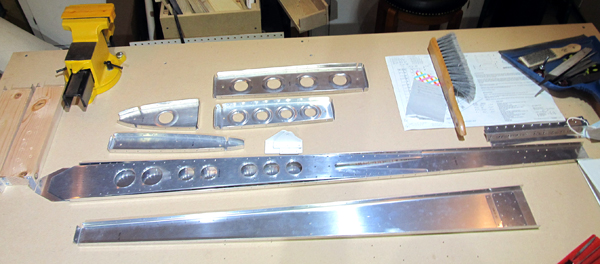
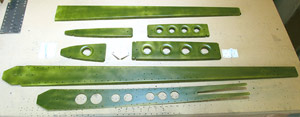
The first item to work on according to the builder's plans is the vertical stabilizer so I pulled the individual parts from the inventory and started the clean up process to assemble the "skeleton" framework of the tail section.
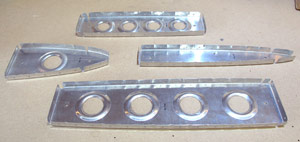
The parts included: VS-706, VS-803PP, VS-412PP, VS-808PP, VS-707, VS-411PP, VS-705, VS-702, VS-704, VS-410PP, VS-01401, and VS-801PP.
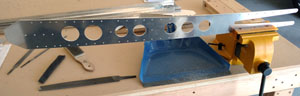
The basic idea is to deburr any rough or machined edges before clecoing (using small clamps to temporarily hold pieces together) and match-drilling pre-punched holes for the final riveting process.
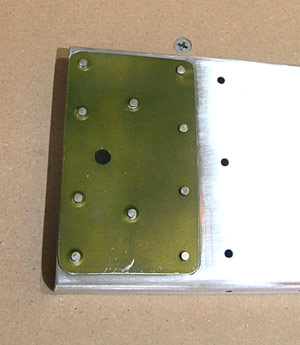
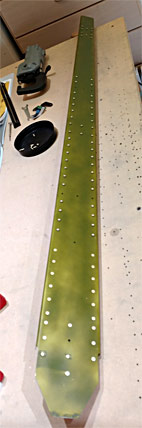
I was a little concerned about the bow in part VS-808PP (rear stabilzer doubler as seen above) but after a quick call to Van's builder support I was told that it wasn't uncommon in the forming process for a part to have a slight bow and that it would be perfectly fine and flat once the rivets were in place.
I have been using a combination of flat and round files, scotchbright (gray- "ultrafine" pads), and sandpaper to polish the edges and lightening holes before proceeding to the next step.
|
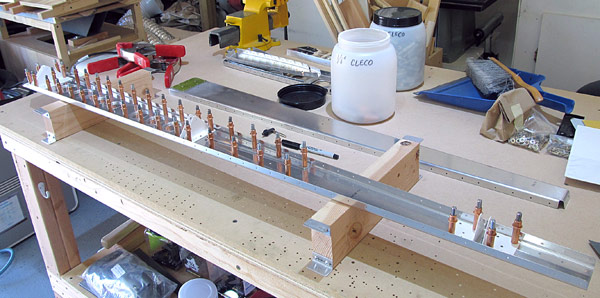
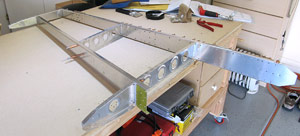
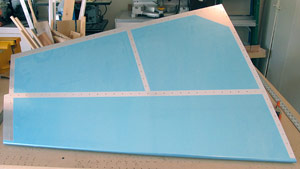
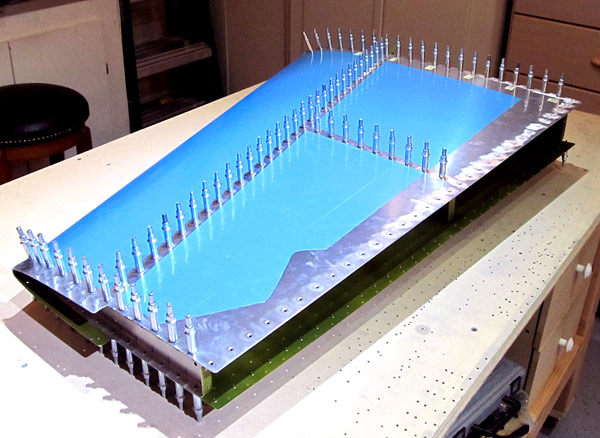
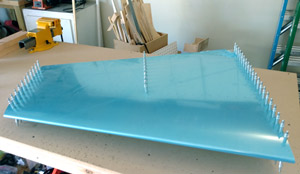 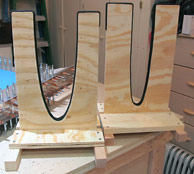 I clecoed the VS-801PP vertical stabilizer skin to the ribs so that I could determine what the profile of the stabilizer was because I wanted to fabricate a set of cradles (an extra set of "hands") when working on the piece. These will hold the stabilizer vertically which will come in handy when riveting the ribs to the skin later on in the build. I clecoed the VS-801PP vertical stabilizer skin to the ribs so that I could determine what the profile of the stabilizer was because I wanted to fabricate a set of cradles (an extra set of "hands") when working on the piece. These will hold the stabilizer vertically which will come in handy when riveting the ribs to the skin later on in the build.
|
|
 Of course just like everything in this build once you put it together you have to take it apart. Of course just like everything in this build once you put it together you have to take it apart.
|
|
|
|
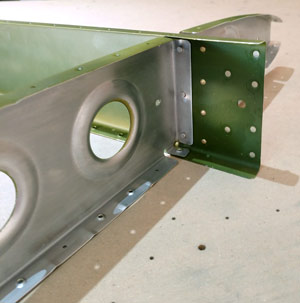
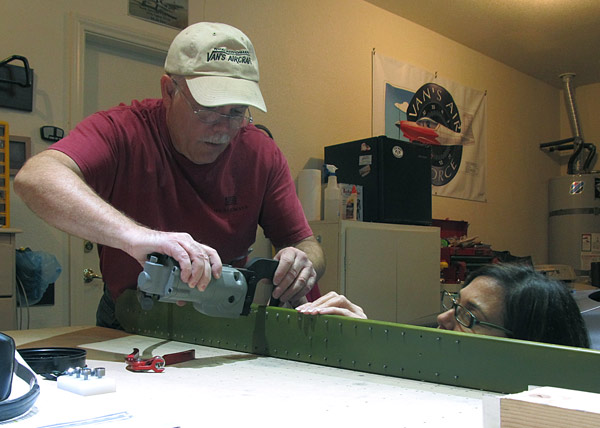
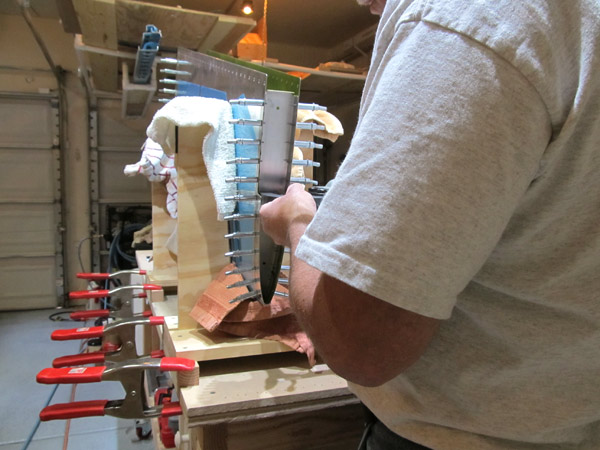
 The plans have you place a doubler plate VS-01401 at the base of the forward spar VS-702 then draw a line and cut the bottom of the spar off. I used a band saw with a metal cutting blade to make the cut. After cutting and deburring those pieces you then rivet everything together. The plans have you place a doubler plate VS-01401 at the base of the forward spar VS-702 then draw a line and cut the bottom of the spar off. I used a band saw with a metal cutting blade to make the cut. After cutting and deburring those pieces you then rivet everything together.
My wife and I are using our pneumatic rivet gun to rivet VS-702 to doubler VS-01401.
This is what it looks like when it is riveted together. (You are looking at the forward face of the spar, the back has the rivets set flush because it will need to be that way later when installed to a plate at the rear of the fuselage.)
|
|
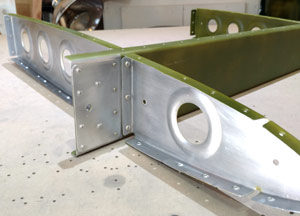
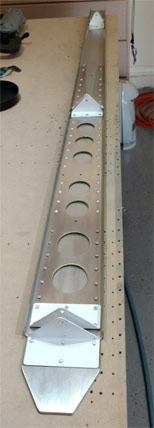
 There are three sets of hinge plates that need to be final drilled with a #12 bit (VS-410PP, VS-411PP, and VS-412PP) which then are clecoed on top of the rear spar VS-803PP and rear doubler plate VS-808PP. There are three sets of hinge plates that need to be final drilled with a #12 bit (VS-410PP, VS-411PP, and VS-412PP) which then are clecoed on top of the rear spar VS-803PP and rear doubler plate VS-808PP.
After all of these parts have been clecoed together all of the pre-punched holes gets final drilled with a #30 drill bit.
(I used a #30 reamer because Van's has done such a super job on the hole punching that a reamer works just fine.)
You have to pay special attention on the bottom hinge plate VS-410PP because not everything will receive rivets when it comes time to final riveting, plus there are a couple of holes that need to be match drilled that aren't pre-punched.
|
|
  The vertical stabilizer ribs were next on the list of things to do so I used a set of fluting pliers to flute the flanges of ribs VS-704, VS-705, VS-706, and VS-707 I also adjusted the flanges so that they would fit the contour of the vertical stabilizer skin VS-801PP. The vertical stabilizer ribs were next on the list of things to do so I used a set of fluting pliers to flute the flanges of ribs VS-704, VS-705, VS-706, and VS-707 I also adjusted the flanges so that they would fit the contour of the vertical stabilizer skin VS-801PP.
|
|
 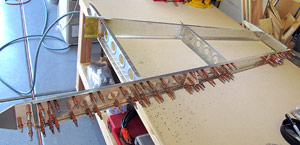 Now all of the vertical stabilizer ribs VS-704, VS-705, VS-706, and VS-707 and the front spar VS-702 and the rear spar VS-803PP and rear doubler plate VS-808PP. get clecoed together so that final drilling for the ribs can take place. Now all of the vertical stabilizer ribs VS-704, VS-705, VS-706, and VS-707 and the front spar VS-702 and the rear spar VS-803PP and rear doubler plate VS-808PP. get clecoed together so that final drilling for the ribs can take place.
These get final drilled with a #30 drill bit (I used a #30 reamer because the pre-punched holes were so close to the final size.) There was one tricky spot that I had to use a 12 inch #30 bit to get at the holes in the root nose rib VS-705 where it attaches to the front spar VS-702 because of the tight fit but it was a "snap" to do using the special bit!
|
|
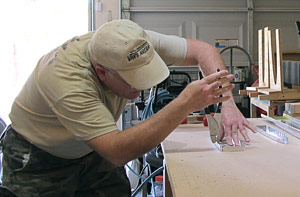
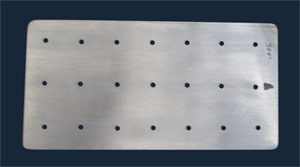
 To get the vertical stabilizer skin VS-801PP. ready for the next step I used a soldering iron to strip the protective vinyl off of the areas where the holes are pre-punched. This leaves the remainder of the vinyl on which helps to protect the skin from scratches. To get the vertical stabilizer skin VS-801PP. ready for the next step I used a soldering iron to strip the protective vinyl off of the areas where the holes are pre-punched. This leaves the remainder of the vinyl on which helps to protect the skin from scratches.
|
|
 Here is what the skin looks like after the vinyl covering the pre-punched holes is removed. Here is what the skin looks like after the vinyl covering the pre-punched holes is removed.
|
|
  Now the skin gets deburred and then clecoed in place over the frame and then all of the pre-punched holes need to be final drilled/reamed with a #40 drill bit. Now the skin gets deburred and then clecoed in place over the frame and then all of the pre-punched holes need to be final drilled/reamed with a #40 drill bit.
|
|
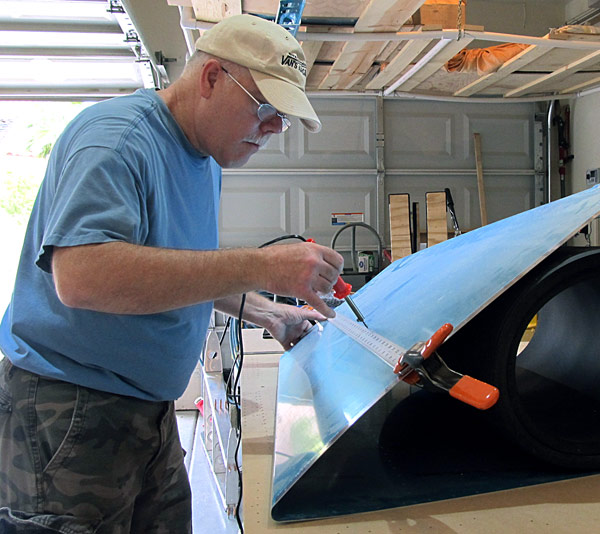
  Of course everything has to be taken apart and primed (to prime or not to prime...that is the question!) Of course everything has to be taken apart and primed (to prime or not to prime...that is the question!)
I elected to prime mainly the structural parts and part of the skin that they will touch.
I am using just a light coat of Tempo Aviation "rattle can" A-702 Zinc Phosphate primer here. It is easy to apply and "sticks" to the aluminum very well. I let the paint dry for a couple of days before handling it.
|
|
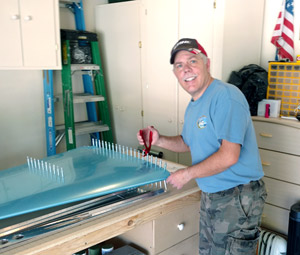
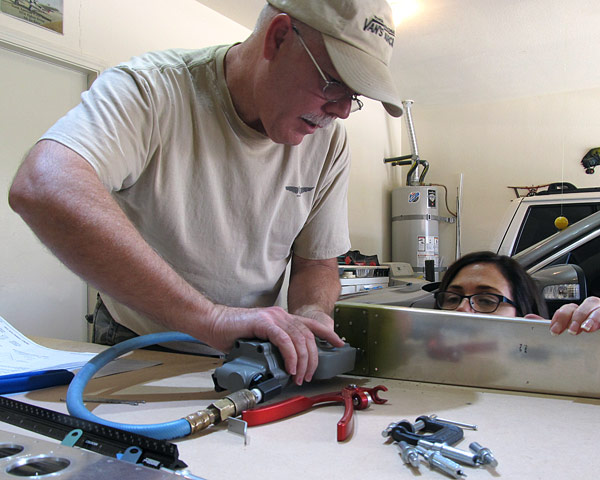
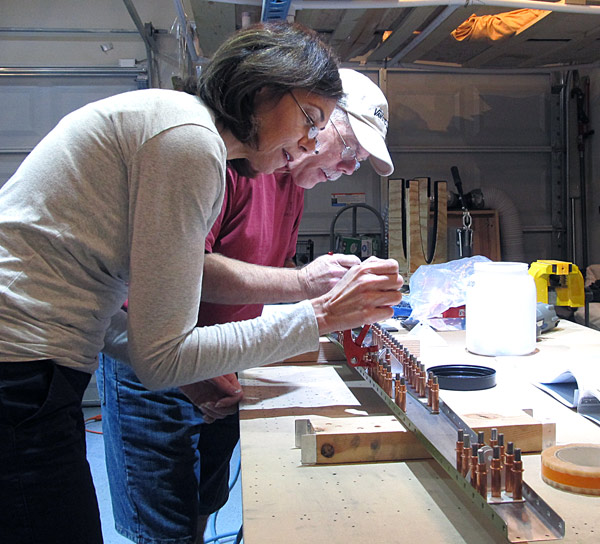 Here my wife and I are clecoing the individual parts (VS-808PP Doubler, VS-410PP bottom Hinge bracket, VS-411PP mid Hinge bracket, and VS-412PP top Hinge bracket) to the Rear Spar (VS-803PP) in order to be final riveted together.
You have to be careful here because there are several different rivets called out in the plans and the direction you set them is important too. The bottom set of rivets are AN426AD4-6 and AN426AD4-7 rivets and need to be set flush side to forward face of the spar so that later in construction the spar will set flush to the fuselage when mounted. We set those with our Back Riveting tool and 3X rivet gun.
|
|
 Here we are riveting the rest of the parts (VS-808PP Doubler, VS-411PP mid Hinge bracket, and VS-412PP top Hinge bracket) to the Rear Spar (VS-803PP) with our Pnuematic Squeezer.
You have to be careful here because there are three different size rivets called for in the plans AN470AD4-7, AN470AD4-6, and AN470AD4-5 as well. We set the universal or "domed head" side of the rivet towards the aft face of the Rear Spar.
|
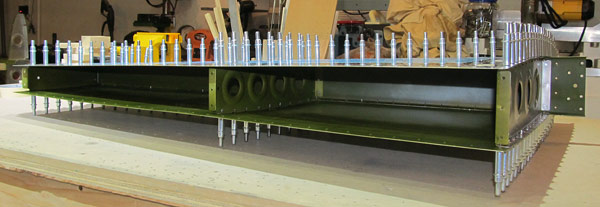
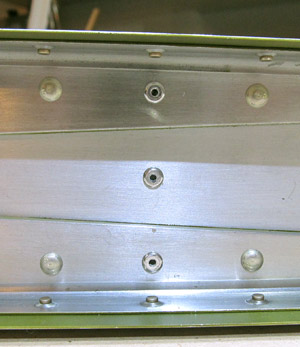
  Here is the Vertical Stabilizer Rear Spar (VS-803PP) assembled with the rivets in place.
At he bottom of the rear spar (the last 10 rows) you have to be careful to have the manufactured heads of the AN426AD4-6 and AN426AD4-7 rivets set on the foward face of the spar so that later when attaching the vertical stabilizer to the empennage they will sit flush with the F-01412 Bulkhead and F-01412C Deck Angle.
There is also a hole that does not receive a rivet on the bottom set of hinge plates that will later be used to send an electrical wire through to power the position light on the tail.
* You might be wondering why one side of the spar is painted with primer and the other side isn't? That is because later when I paint the airplane (I'm planning on using Stewart Systems Waterborne Paint) I won't have to sand the existing primer in order to re-paint with their primer.
|
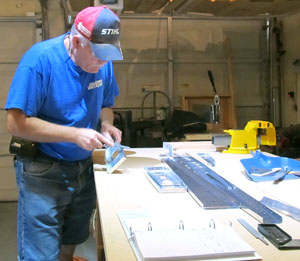
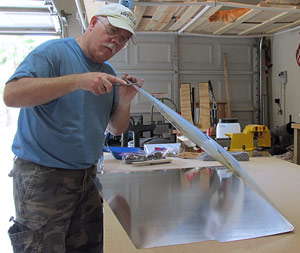
The next step in the Vertical Stabilizer build is to rivet the ribs to the front spar (VS-702) but before you do that it would be a good idea (if you haven't done this already) to get some aluminum sheet from the local hardware store and make some practice rivet pieces so that your riveting skills can be honed before each riveting session.
It doesn't look like it will be a tough job but I had quite a time getting these ribs riveted to the spar because of the tight angles that are required to set the AN470AD4-4 rivets. The root ribs require AN470AD4-5 rivets so be careful to take note what size rivet you use as well.
I even took an extra step and drilled out the rivets I "shot" in the practice piece and then re-riveted them again! It is a skill you will master....Ask me how I know?
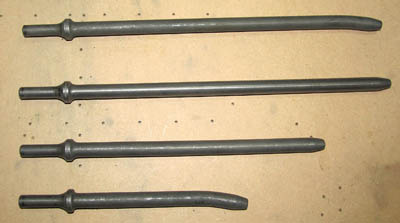
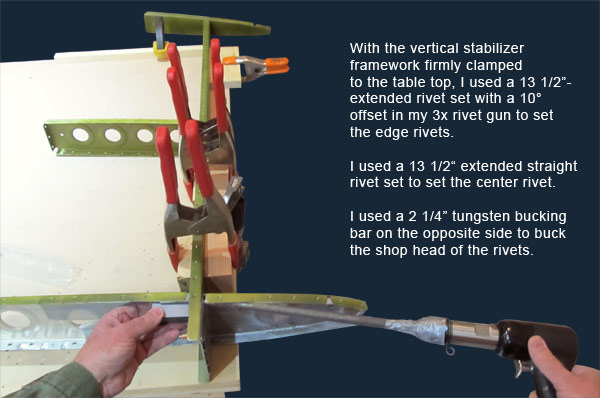
The nose rib (VS-705) and root rib (VS-704) were particularly hard for me to set and it seemed that nothing I had on hand would do an adequate job until I found these extension rivet sets for my 3x rivet gun.
My pneumatic rivet squeezer with a longeron yoke didn't work because the gun body pushed up against the rib and caused the flanges to flare out from the front vertical spar (VS-702) and my hand squeezer wouldn't work for the same reason.
The top two rivet extension sets in the photo are 13 1/2" long. One is a straight 1/8" cupped set and the second one is a 1/8" cupped set with a 10° offset. The long length of the rivet sets allowed the body of the 3x rivet gun to clear the nose rib (VS-705) end without bumping up against the rib web or flanges. (Of course with such a long set the air pressure had to be "dialed up" some so that there was enough pressure to set the rivet.)
I double lined the ribs with duct tape so as not to get bucking bar marks or rivet set dings anywhere....it worked pretty good!
* I would have to admit that this has been one of the most frustrating moments in the construction of the airplane at this point because I could not find anywhere on line photos or descriptions as to how anyone has accomplished this task.
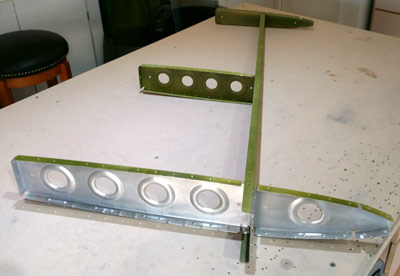
This is the vertical stabilizer frame with the ribs VS-704, VS-705, VS-706, and VS-707 riveted to the front spar (VS-702).
|
The frame is then clecoed in place inside the vertical stabilizer skin (VS-801PP) which will be "flush riveted" using AN426AD3-3.5 and AN426AD3-4 rivets.
There are six holes at the base of the stabilizer that do not receive rivets so I put masking tape next to those holes to remind me to keep them open.
This is where the empennage fairing will be attached later on in construction.
|
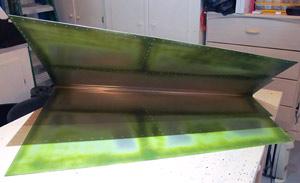
This is looking inside the vertical stabilzer. I will have to reach inside with the bucking bar to set the rivets.
The plans say to start in the middle and work towards the tip root (VS-706) and then towards the root rib (VS-704) on each side and then from the mid root (VS-707) aft to where the rear spar assembly will be placed.
|
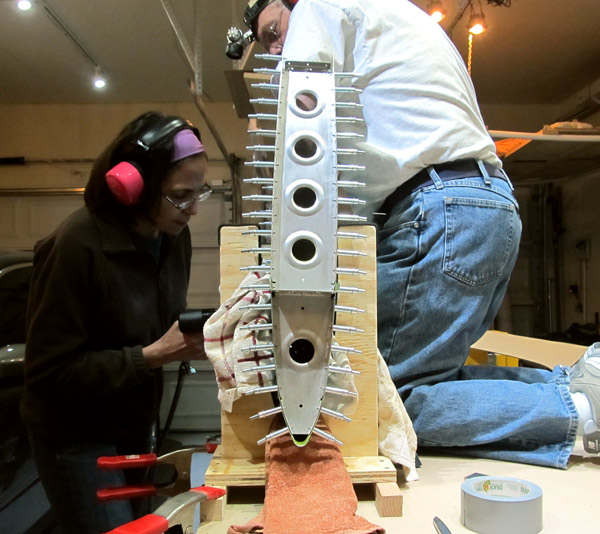
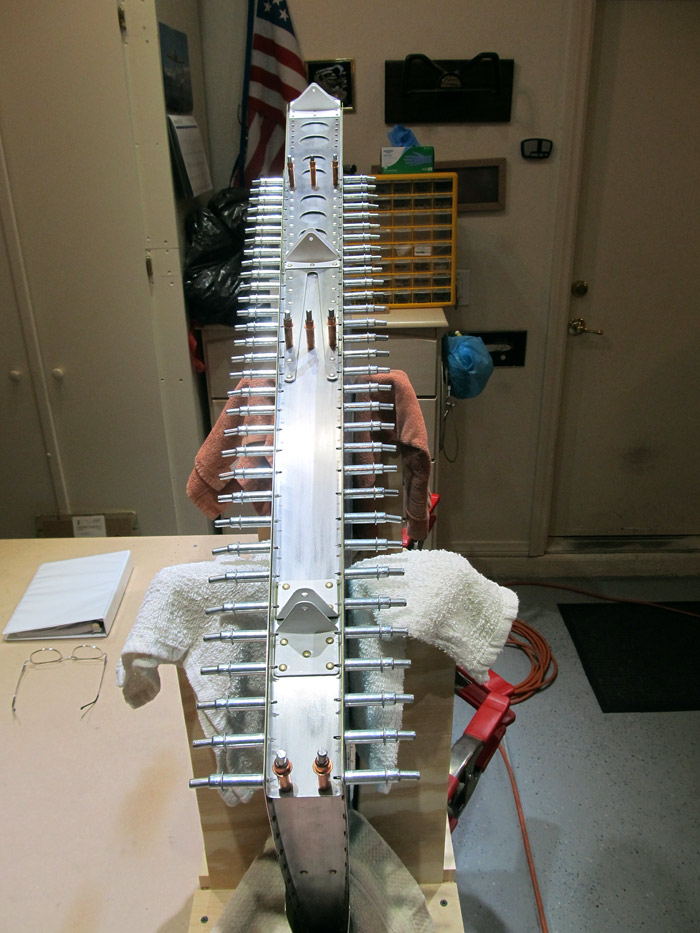
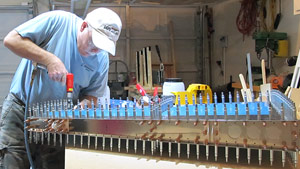
We set the entire vertical stabilizer into a set of cradles and began the process of setting the AN426AD3-3.5 and AN426AD3-4 rivets used to attach the skin to the internal framework. You have to be careful to only use the AN426AD3-4 rivets where the ribs, skin, and spar intersect.
My wife used a 3x rivet gun with a flush swivel mushroom set on the outside of the skin while I used a short tungsten bucking bar on the inside to form the shop head of the rivet.
* I used some duct tape and rags to line the inside of each section so that if somehow the bucking bar was dropped we wouldn't have a accidental dent. Fortunately all went well!
|
Next the vertical stabilzer skin was riveted to the nose rib (VS-704) and root rib (VS-705) using the pneumatic squeezer with flush rivet sets installed.
AN426AD3-3.5 and AN426AD3-4 rivets were used as before with AN426AD3-4 rivets being used at the intersection of the rib and vertical spar VS-702 section.
|
|
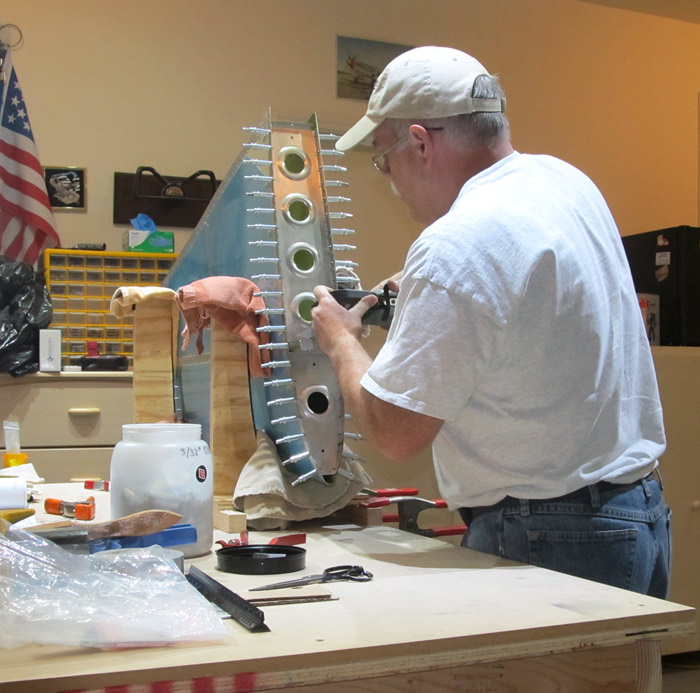
The rear spar assembly VS-803PP was clecoed to the vertical stabilizer so that the skin could be attached to it using AN426AD3-3.5 rivets. I used the pneumatic squeezer to set these rivets.
Where the tip rib (VS-706) and rear spar VS-803PP met, I used the pneumatic squeezer to set AN470AD4-4 rivets and where the root rib (VS-704) and rear spar VS-803PP met, I used the 3x rivet gun and tungsten bucking bar to set AN470AD4-6 rivets.
 Where the mid rib (VS-707) and rear spar VS-803PP met, I used LP4-3 blind rivets and set them using a CherryMax G-27 rivet gun.
|
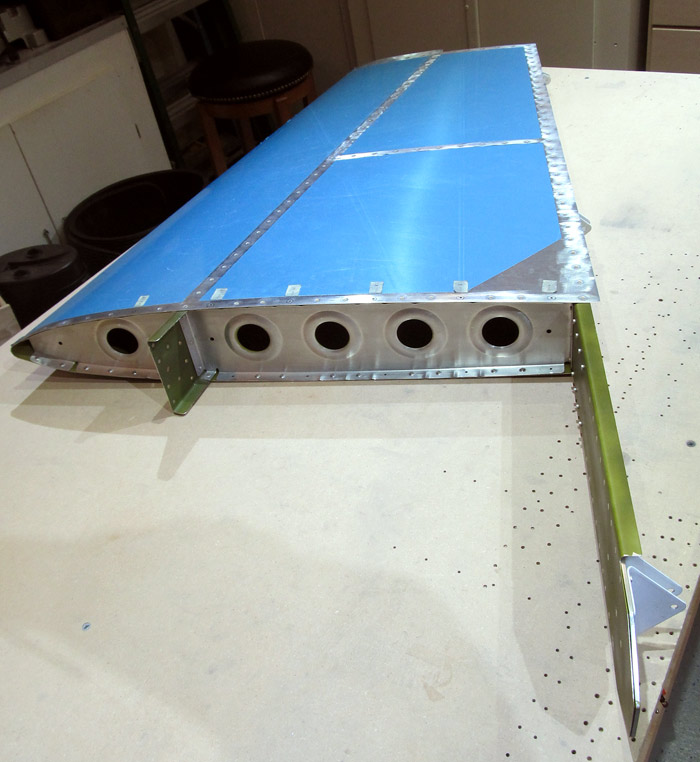
Here is the finished (for now) vertical stabilizer! there will be a fiberglass tip fairing added later.
|