
Spark Plug Check
|
I have been flying for over 38 years and in all that time I was never shown how to change spark plugs in an airplane. I guess there was always a mechanic around and it was never an issue and besides that up until a few years ago I had always rented and never owned an airplane so it wasn't even an option. |

|
Spark Plug Check Get aircraft ready to remove spark plugs |
|||||||||||||||||

|
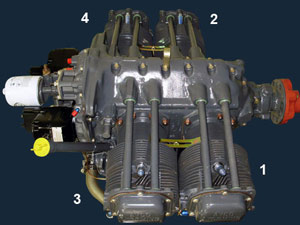
Open Cowling Remove any cowling necessary to gain access to the spark plugs. |
|||||||||||||||||
|
Trace Plug Wires From Magnetos to Cylinders Does each cylinder have an ignition source from the right and left magneto? The cylinders are numbered (stamped on the case); there should be a plug wire running from the right magneto to one set of plugs and a plug wire running from the left magneto to the other set of plugs. |
|||||||||||||||||
|
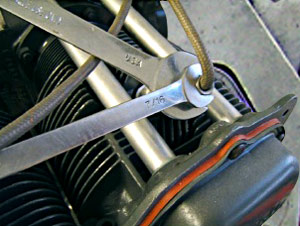
Remove the Plug Leads Use a Large wrench to loosen the lead and a small wrench to prevent the lead from twisting. Normally a 3/4" wrench is needed to loosen the large nut while you hold a 7/16" wrench on the smaller nut (this prevents twisting and damaging the ignition lead). |
|||||||||||||||||

|
After the plug leads have been removed, and before removing the spark plugs, check the ends for any damage and wear. Avoid touching the connector or harness spring with your fingers which can cause contamination from dirt or grease which could cause misfiring of the plug. |
|||||||||||||||||

|
Normally a 7/8" deep socket is used to remove the massive electrode spark plugs (pictured here) but be sure to check the size needed to remove your spark plugs. Champion has a great manual to help figure out what kind of plugs you have and the wrenches you will need to service them click here and download AV-14... Be careful not to drop the plugs as this can crack the ceramic core and render the spark plug unusable. Also take note when removing the plug to see if there is a temperature probe ring (CHT gauge) installed which may not require the plug to have a copper spark plug gasket. |
|||||||||||||||||

|
It is handy to use a spark plug caddy to transport the spark plugs that you remove from the cylinders. Place them in order on the tray, electrode side up. Check the condition of each plug. What does it look like? Champion has a chart that shows some common plug wear descriptions with photos. Click here and download AV6-R... |
|||||||||||||||||

|
Don't be too aggressive here because you also have to protect the ceramic core which is against metal and can be cracked easily. For really oily or dirty plugs you might need to soak them in MEK. (Check to see why this condition is present with your mechanic.) |
|||||||||||||||||

|
Spark plug limits are between .018- .022 Gap limits are noted on the tag that comes with the spark plug or you can look it up in the service manual from the plug manufacturer. |

|
For best results use a gap setting tool because the electrodes are easy to overset and it is dangerous to try to expand the electrode back out due to the fragile nature of the ceramic core. |
|||||||||||||||

|
Clean the threads with a stainless steel brush or wire wheel and make sure to check for electrode erosion. If the electrode can pass through the 1/4" hole on the gauge it should be discarded. |

|
This is an expensive tool which tests the spark plug so you might want to have your mechanic check this for you. It's "solid state" ignition system produces a very stable ignition test voltage for greater accuracy and reliability; it tests the spark from each electrode of the spark plug. |
|||||||||||||||

|
The gaskets must be changed each time a spark plug is pulled for inspection so place a properly sized copper gasket on the plug threaded end (new plugs come with these already) or if you intend to reuse the old gaskets anneal (heat treat) them before using them again. |
|||||||||||||||||

|
Just a short line of compound should be applied to the second and third threads of the spark plug end. This prevents galling and seizure of the plugs. Be careful to not contact electrodes as it could short out the plug. Do not apply to shielding barrel threads. |
|||||||||||||||||

|
||||||||||||||||||

|
Remember not to place the spark plug tray anywhere where it can fall or drop the plugs and ruin all of your hard work. Place the plugs in the cylinders and hand tighten them first then use a torque wrench to tighten them (420 in/pounds) in place. Remember to reset your wrench to the lowest value when storing it so it remains calibrated correctly. |
|||||||||||||||||
|
||||||||||||||||||
|
|
Re-install the plug leads, hand tight at first then use your 3/4" wrench in combination with the 7/16" wrench and tighten with just a 1/8 turn to finish the job. |
Place a logbook entry in the Aircraft Logbook, do a magneto check, okay the aircraft for return to service, and you're done. The FAA has a free video which includes a sample logbook entry click here to view it...(there is a slight delay so wait for presentation)